Pages

Sunday, September 9, 2012

Hand Needle Threader


I love gadgets. Especially, when they make sewing and quilting easier for me.  DH and I travel often, so I always have handwork to do. 


This is the size needle I use for most of my quilting and sewing.  It is a #10 quilting needle. When I hand quilt, I use this needle with 30 weight quilting thread. Difficult to thread sitting on the couch at home, impossible to do while riding in the car down a bumpy road.


That is until I found this gadget. Of which, I have 4! I bought my first one in 2006, and I am still using it. Originally, they only came in brown. Now, they are available in pink, green, and purple.

Place your needle eye down in the needle slot. This is sometimes a challenge for me, as the eye is so tiny.

 Lay your thread through the thread slot.

Gently, hold the thread on both sides while pressing down on the lever with your other hand. You should feel the thread move as it is being pushed through the needle eye.


Carefully, pull the needle up from the threader. 

It may take some practice to get the hang of it, but it definitely works. The package lists the type of eye the needle must have to work, as some are too large or the wrong shape.


There is a built in cutter just behind the thread slot. 

These are perfect for traveling by ...planes, trains, boats, and automobiles... because frayed edges don't affect your ability to thread the needle. Proof being, these photos were taken in the backseat of our car as we traveled to Massachusetts to see our daughter, Emma for her birthday.

Til next time, 

Mary

Wednesday, August 22, 2012

Tabletop Thread Catchers


Friday night was Material Girls at Pins & Needles. After a delicious dinner & show-n-tell, we made thread catchers. The pattern was from Red Hen Fabrics
 
The really neat thing about these catchers is that they fold down for easy 
transport.


Just twist and push down. The bottom slides into the top ring.


This is what it looks like in its compact state.


We made two changes to the pattern: cutting the cardboard circles and batting at 4" instead of 3 7/8" (cut your fabric circles at 5") and substituting package strapping for the 4” wooden embroidery hoop. Here is how to do that.
  Mark a piece of strapping at 13 inches.


Cut the strap approximately 3/8" beyond the mark. Cut a second piece of strapping the same length as the first. 


Overlap the first strap so that the unmarked end meets the marked line. 


Using duct tape, secure the overlapped ends. This creates the inside circle.


Center the second strapping piece over the joined ends of the circle. Tape in place. 


Keeping the second strap snug against the first, securely tape one end of the outside ring in place. 


  Bring the other end around to meet the first.


Secure  with tape. You now 
have a "recycled" hoop.


Til next time,
Mary

Thursday, August 16, 2012

Napkins and a Bib

    My mom will be 88 years old next month. She is an independent lady who lives by herself, drives to all her necessary destinations, and crochets blankets and shawls to support ministries at her church. So, when she asked me for an adult bib, how could I say no? I couldn't. To the Google, where I found a pattern . I then decided she should have coordinating napkins to go with her bib. These are my directions for 18" square napkins, which require 1 1/8 yards of fabric.


   For each napkin, cut a 19" square. 

   Since, I prewash all my fabrics, I give my squares a good dosing of starch, both sides. This is to reduce stretching when I draw my lines. I wanted lines 1/2" from the outside edge on all four sides. My Quarter Inch Seam Marker is 1/2" wide, so it is perfect for my lines. 

   After marking the sides, the lines should cross at the corners.

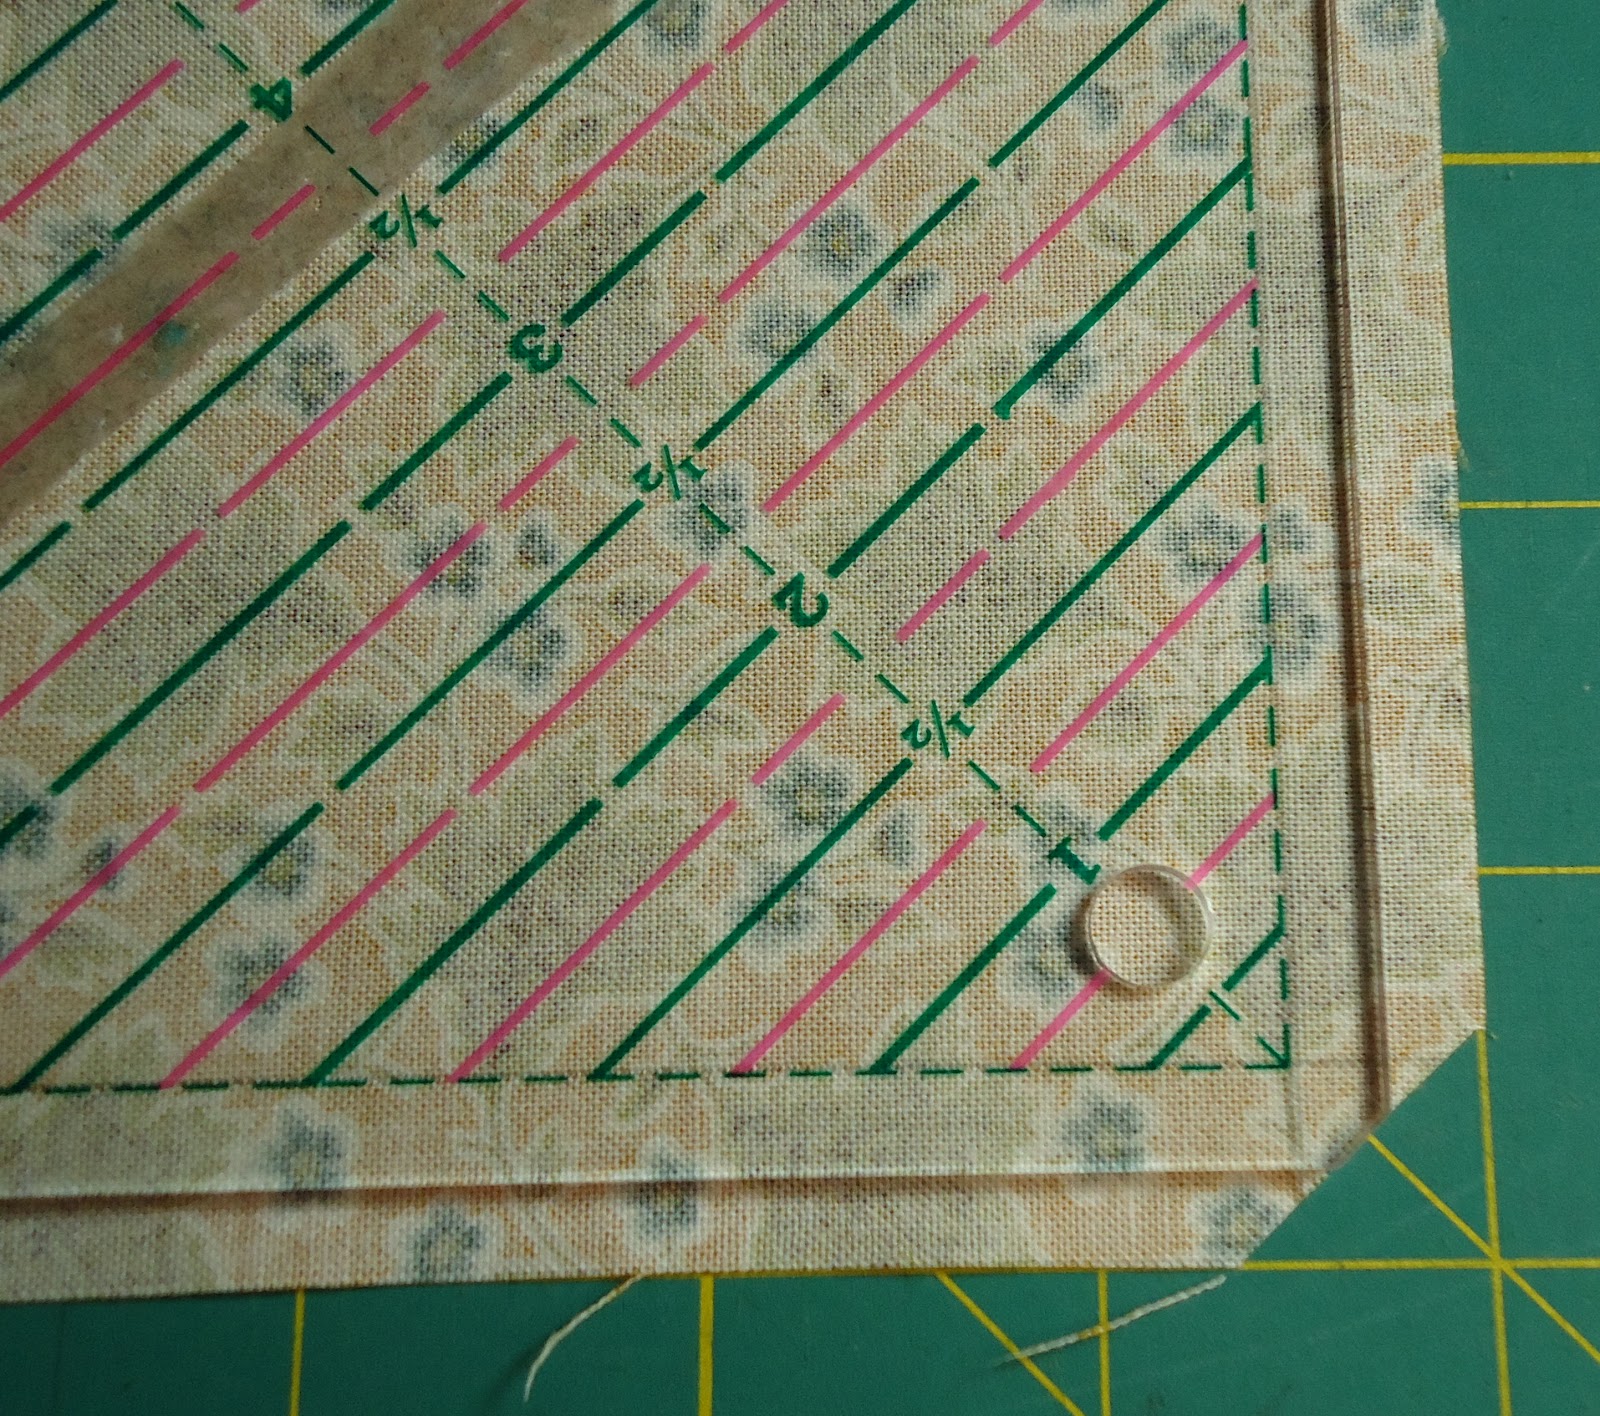
 To reduce bulk in the corners, I trim off the point. But how much? After some trial and error, I discovered that my Quarter Square Triangle ruler did the job. Align the dashed 1/4" seam lines atop of the drawn lines.
 Trim straight across the blunt tip. 
 Fold over the corner with the fold at the intersection of the drawn lines(white X). Press, dab with some starch, and press again. Repeat for all four corners.

 Fold the sides up to the drawn lines and press. I use my stiletto to hold the fabric so as not to burn my fingers. As with the corners, I dab starch on the folds and press again.
 This is what my napkins look like after the first turnover.
For the second fold, I begin at the corner. Fold up each side to meet in a 45 degree angle. Press, dab with starch, press again. Repeat for the remaining corners. Press sides, easing as may be necessary to have a straight edge. Dab with starch and press. 

 Stitch the seam at a consistent distance from the edge, making sure to catch the inside fold.
   This is Mom's reversible bib and coordinating napkins.
And this is Mom :)

Til next time,
Mary
Monday, August 13, 2012

Machine Needle Threaders

  Before I begin today's topic, I wanted to share my s-l-o-w progress on Orca Bay.
Rows 1&2 and 3&4 were sewn together. Matching seams and easing in the geese takes time.It does look striking when seen though the camera.

  Many new sewing machines come with automatic needle threaders, which are terrific inventions. However, of the half dozen machines that I own, only one has it. Fortunately, relatively inexpensive machine needle threaders are available. They are portable and can be used on any machine.
These are three types of machine needle threaders that I own. 
All of them work they same way.
This is a close up of the Dritz brand. 
Hidden inside of the white end is a thin flat metal bar.
 This bar is what pushes the thread through the eye of the needle. 
Be careful not to bend the bar, as that will make it non-functional.
Notice the triangle on the blue part. It must face up(vertical) when threading the threader.
 Lay the thread horizontally through the teeth of the threader.
Lightly hold each side of the thread as you place the threader around the needle,
 keeping that triangle facing up.

Gently add pressure to the blue cylinder as you slide it down the shaft towards the eye of the needle. When the eye is reached, the thin metal bar pushes the thread through it. With smaller size needles, I place my finger on the right side of the needle for support(left side for featherweights).
Using my stiletto, I pull the thread through the needle. 
I am now ready to sew.
                        
The threaders I own also have holders for inserting a new needle in your machine.

I can still thread most front facing needles without much trouble. However, side threading machines and/or smaller needles are a different story. Especially my featherweight, which threads right to left. Using these needle threaders, I can thread a machine with my eyes closed. Not that I want to :)

Til next time,
Mary

Sunday, August 12, 2012

The New Smaller Big Board

There was no sewing to be done yesterday. Instead, I read a book, Intimate Strangers by Laura Taylor, on my HP Touchpad. So, I thought today I would post some photos of my New Smaller Big Board(NSBB).

 
   This is my original large pressing surface. Made from an old hollow core luan door(salvaged from our home in NJ), covered with a blanket, some Insul Brite, and several layers of muslin, it had served me well for almost 15 years. When I originally made it, I was making home decorating items that used fabric 54" to 60" wide. A surface 30" wide was perfect then. Now, I wanted a narrower more portable pressing surface to attach to my wide ironing board.
   Off to Home Depot! I found the perfect base, 1"x 3" boards laminated together, 23" wide by 6 feet long. I could have used 3/4" plywood, but then I would have to cut it in half lengthwise.Short crosswise cuts are doable, but we don't have the set up for those long straight cuts. Not to mention, it wouldn't fit in my Sonata, which the laminate would. I also purchased 2- 1"x3" x 6' boards to use a cleats.

   This is the underside view of my NSBB. There are several tutorials on the web for how to make one. I read several, then modified to meet my needs. The board is not permanently attached, but I can fold up the unit for storage when needed. I can also adjust the height if I want to sit while pressing many pieces.

    Originally, I had placed it in front of my design wall. Notice the narrow space between the pressing board and cutting station. This was before I replaced the back legs on the table so, it would sit partially on the hearth. That opened some floor space,but more was needed. Especially, if I wanted friends to come to sew.
   So, I moved it to the fabric nook. The NSBB extends a bit into the bookcase, but I have access to the fabric and storage bins. The overhead light and iron are plugged into the same power strip. I know the iron is off if the light is off. 

  Wes came last Sunday to test drive my new space. It worked well and we had a good time working on our projects.

Til next time,
Mary 


Saturday, August 11, 2012

Progress on Orca Bay

   I love my new work space. It inspires me to work on projects that have been tucked away for months.I can't say years as I've only been quilting for 6 years. 

   These are some of the pieces for Orca Bay , set out to be sewn. After I took the photo, I realized that every other set of geese should be flying in the opposite direction. Otherwise, the wouldn't have the right effect.

   The geese should all fly towards the light background Ohio Star blocks. I have sewn all these into rows, which I am hoping to assemble today. Next, will be the borders.

   During our visit to Wisconsin in June, my cousin Karen gave me a cute pincushion. It sits next to Frances, my first Husqvarna/Viking sewing machine. The pincushion is perfect. It holds a ton of pins, a small pair of scissors, and  stilettos between the petals. 

Til next time,
Mary


Thursday, August 9, 2012

Back to Sewing

In the midst of all the redoing and building, I have managed to work on some projects. 


  Last week, Carol and I did some wool applique. I am new to this form quilting/sewing. The first one had die cut pieces, but this one I had to cut my own. I selected a project from the book Pennies from Heaven. I like the embroidery around the center, but the green looks a bit empty. Wool definitely has a nice feel to it.
  The second project is an older block of the month called The Queen and Her Court from A Wing and A Prayer Design. I made block 1 in May(upper right), but didn't have a chance to do June(upper left) or July (lower right) til this week. Notice the difference in color palette from the pattern. I have also completed August, but not when I took this photo. I am now all caught up until September.
  Now I am returning to work on my Orca Bay. It was a Quiltville Mystery last winter that I convinced Carol to do with me. She has finished her top, mine is only half done. So, I am planning to have it completed by Thanksgiving. One year, start to finish.

Til next time,
Mary